This month I've had a lot of fun practicing my brush lettering skills with the #BrushLetterPracticeChallenge hosted by letterer and Instagrammer Olivia. I love having a word already given to me that I can use for lettering practice. Sometimes I have a hard time thinking of good words to write, and this just makes it that much simpler.
Well, I decided to venture out into the world of creative challenges by making a challenge of my own! It's called the Chalk Letter Challenge and it's starting February 1!
One of the gifts I got for Christmas was The Complete Book of Chalk Lettering by Valerie McKeehan, and it has inspired me to work harder on my chalk designs. And that's where I got the idea for the Chalk Letter Challenge.
My hope in creating this challenge is to practice different styles of chalk lettering, and to also get creative with different design elements. And, I would LOVE it if you decided to join in! You don't have to have Val's book or fancy equipment or even an Instagram account. All you need is some chalk, a board, and the challenge prompts, which are below.
Here's how the Chalk Letter Challenge works: First, print or save the prompt image so you can access it quickly and easily each day. If you have Instagram, you can share the image by reposting it from my account, or by saving the image below on your phone and posting it on your account. Make sure to use the hashtag (#ChalkLetterChallenge) and tag me in the photo so I can follow your progress! If you don't have Instagram, you can leave a comment or shoot me an email to let me know you're joining in!
After that it's pretty simple. Each day there is a different word for you to practice. I tried to pick words that would be relevant to chalk lettering work, the season, and--in their entirety--include all the letters of the alphabet. After you've lettered your word, snap a photo and share it on Instagram with the hashtag! (Or share it on whatever social media site you like best.)
I will be following the hashtag and I would love to see your unique work and your progress. If you miss a day, no worries! February is going to be a really busy month for me, so I will probably miss a day here and there too. You can absolutely use more than one prompt word in your design or catch up on missed words anytime.
My hope that we can share tips and tricks, and maybe I can get in some Periscope tutorials too! I'm definitely not a chalk expert, but I have been doing paid and unpaid chalk projects for a while and I would love to keep growing my skills. I hope you'll join me!
Showing posts with label designs. Show all posts
Monday, January 25, 2016
Monday, January 4, 2016
How to Prep Gouache for Brush Lettering + Calligraphy
Today I'm sharing more about my typography techniques! If you missed my first post on lettering, check it out for a list of some of the supplies I use. In this post, I'll be sharing how to prep gouache (rhymes with squash), a form of opaque watercolor that can be used for both brush lettering and calligraphy. This post is the important next step before I move on into sharing specifics about lettering styles.
For this example, I prepped Winsor & Newton's Designers Gouache in Primary Blue. However, I typically use the less expensive Artist's Loft Gouache for practicing or personal projects. It works well and won't break the bank.
When prepping gouache, you will need a small, deep container in which to mix, use, and store unused paint. I used a paint cup--about 3.5 oz in volume and about an inch deep--with a storage lid. I recommend using a small cup like this for a couple reasons. One, if your cup is too big, you will have either too-watery gouache or too much mixture, and to start, you don't need a lot of gouache mixture. Two, if your container is too shallow, you won't be able to properly dip and load your calligraphy nib.
You definitely don't have to buy paint cups to mix your gouache. You can use something small you have at home, like an empty Carmex lip balm jar. However, it is nice to have a container with a lid so you can store any unused mix until you're ready to letter again.
You will also need water, a small paintbrush for mixing (I prefer one with firm bristles), a paper towel for spills and cleaning, and either an eye dropper or straw for adding the water to the paint cup. (Or you can just stand at the sink and use a very fine trickle of water, but start the flow before putting the cup underneath.)
Measuring out the gouache is a process of estimation. When I first learned how to prep gouache, the instructor showed us a swirl of the paint in the cup and said that was how much we should add. My advice for first timers, start small. You can always add a little more if your mixture is too thin. I usually add about a "loop" of paint, as shown below.
Side note: If I'm mixing different colors to create a custom shade, this is the point in the process where I do it. I typically will add a few small dollops of each color and blend with a paintbrush. When I reach the desired shade, I move on to step three. Keep in mind that the water will slightly lighten whatever color you use.
Use your eye dropper or straw to fill the cup 1/2 way to 3/4 of the way with water. Again, if this is your first time, you can start with less and add more as needed.
Use the paintbrush to mix the gouache and water together, pressing down and stirring in a circular motion. Periodically you can pull the brush out to see if gouache is clinging to it. If it is, slide the brush over the rim of the cup to scrape the gouache off and continue mixing. Make sure to press the bristles into the edges where the bottom and sides of the cup meet as the gouache may gather there. The goal is to blend all the solid pieces of gouache into the water.
Your gouache is properly mixed when it is fully blended with the water and the consistency is similar to milk. This is a good consistency for calligraphy. It's a little thicker and remains on the nib. When I do brush lettering, I usually delude the mixture with more water.
The great part about using a cup with a lid is that it's super easy to store your mixture, or take it on-the-go. If your mixture has been sitting for a little while, the gouache may begin to separate somewhat and settle at the bottom. Before you use it again, mix it up with your paintbrush. If it's getting stringy or solid, it's time to dump it and make some fresh!
If you have any questions about gouache prep, please leave them in the comments or tweet to me @MrsEliseMance. Next I will be covering some lettering techniques using prepped gouache so stay tuned!
For this example, I prepped Winsor & Newton's Designers Gouache in Primary Blue. However, I typically use the less expensive Artist's Loft Gouache for practicing or personal projects. It works well and won't break the bank.
Step One: Assemble Supplies
When prepping gouache, you will need a small, deep container in which to mix, use, and store unused paint. I used a paint cup--about 3.5 oz in volume and about an inch deep--with a storage lid. I recommend using a small cup like this for a couple reasons. One, if your cup is too big, you will have either too-watery gouache or too much mixture, and to start, you don't need a lot of gouache mixture. Two, if your container is too shallow, you won't be able to properly dip and load your calligraphy nib.
You definitely don't have to buy paint cups to mix your gouache. You can use something small you have at home, like an empty Carmex lip balm jar. However, it is nice to have a container with a lid so you can store any unused mix until you're ready to letter again.
You will also need water, a small paintbrush for mixing (I prefer one with firm bristles), a paper towel for spills and cleaning, and either an eye dropper or straw for adding the water to the paint cup. (Or you can just stand at the sink and use a very fine trickle of water, but start the flow before putting the cup underneath.)
Step Two: Place Gouache in Cup
Measuring out the gouache is a process of estimation. When I first learned how to prep gouache, the instructor showed us a swirl of the paint in the cup and said that was how much we should add. My advice for first timers, start small. You can always add a little more if your mixture is too thin. I usually add about a "loop" of paint, as shown below.
Side note: If I'm mixing different colors to create a custom shade, this is the point in the process where I do it. I typically will add a few small dollops of each color and blend with a paintbrush. When I reach the desired shade, I move on to step three. Keep in mind that the water will slightly lighten whatever color you use.
Step Three: Add Water to Cup
Use your eye dropper or straw to fill the cup 1/2 way to 3/4 of the way with water. Again, if this is your first time, you can start with less and add more as needed.
Step Four: Mix Gouache and Water with Paintbrush
Use the paintbrush to mix the gouache and water together, pressing down and stirring in a circular motion. Periodically you can pull the brush out to see if gouache is clinging to it. If it is, slide the brush over the rim of the cup to scrape the gouache off and continue mixing. Make sure to press the bristles into the edges where the bottom and sides of the cup meet as the gouache may gather there. The goal is to blend all the solid pieces of gouache into the water.
Your gouache is properly mixed when it is fully blended with the water and the consistency is similar to milk. This is a good consistency for calligraphy. It's a little thicker and remains on the nib. When I do brush lettering, I usually delude the mixture with more water.
Step Five: Store Unused Mixture
The great part about using a cup with a lid is that it's super easy to store your mixture, or take it on-the-go. If your mixture has been sitting for a little while, the gouache may begin to separate somewhat and settle at the bottom. Before you use it again, mix it up with your paintbrush. If it's getting stringy or solid, it's time to dump it and make some fresh!
If you have any questions about gouache prep, please leave them in the comments or tweet to me @MrsEliseMance. Next I will be covering some lettering techniques using prepped gouache so stay tuned!
Labels:
art,
calligraphy,
currently,
designs,
DIY,
ELM Creative,
essentials,
gouache,
lettering,
new,
prep,
supplies,
tips,
tools,
typography
Friday, January 1, 2016
My Favorite Lettering Supplies
I'm excited to kick off a new year with some new things, both in my Etsy shop and here on my blog! I love creating and sharing art, and I want to bring more of that into this blog. To start, I'll be diving into lettering and typography art!
People often ask me about my typography: is it hard to learn, how do you do it, what supplies do you use? In upcoming posts, I'll dive more into sharing the ins and outs of creating different types of lettering art. To start, I'm sharing some of my current favorite lettering supplies--a list that is subject to change because it's always fun to try new things!
1. Nibs: I'm currently using these Speedball Hunt Bowl Pointed Pen No. 512 Nibs. I like the fine tip for making delicate lines and the bowl shape to hold more ink. These nibs work well in my next favorite supply...
2. Oblique Nib Holder: After I got this Speedball Oblique Pen Point Holder, I never went back to my standard nib holder. The oblique holder puts the point of the nib at a better angle for writing delicate calligraphy at a slant.
3. Inexpensive "Practice" Gouache: I love using gouache for calligraphy and painted lettering. Gouache is a form of opaque watercolor. When you're learning and practicing, you may go through a decent amount of gouache, so I recommend snagging some less expensive tubes, like this set of 12 paints Artist's Loft.
4. Designer Gouache: For special projects and fancy occasions, you may want to invest in a high quality gouache like Winsor and Newton Designers Gouache. A great color is Jet Black, though they have lots of options.
5. Paint Cups: Gouache does take some prep work to make it the proper consistency for use in a calligraphy pen. These Artist Loft Plastic Paint Cups work great for prepping, using, and storing gouache. [In a future post I'll go over the steps for prepping gouache.]
6. Slim Round Paint Brush: I've been doing more brush lettering and my favorite bush to use is a size 1 round, like this one from Michael's. The slim, long bristles are good for creating thin and thick lines, depending on the angle and pressure you put on them.
7. Watercolor Markers: I started learning how to do modern calligraphy styles with duel tip watercolor markers. They can help you learn about how to apply pressure to create the shapes and lines you want for your lettering. My favorite ones to use are Tombow Duel Brush Pens which come in a wide variety of colors and sets.
8. Pad of Paper: I like mix media paper for everyday use with gouache and markers, two non-dry art mediums. I like this pad by Canson because it's a great size--not too small, not too big to take on-the-go--plus the pages are perforated for easy removal. If you're looking for a higher quality paper for special projects, I recommend an archival quality Bristol paper, like the Strathmore 500 series.
Other tools I use frequently include a ruler, ball bearing compass, scrap paper, cup of water, paper towels, pencil, and large eraser.
I'll be sharing more posts on lettering soon! If you have questions or certain things you want me to cover, please let me know. I firmly believe anyone can learn how to do different lettering techniques with patience and practice, so if you want to learn, now is the time!
People often ask me about my typography: is it hard to learn, how do you do it, what supplies do you use? In upcoming posts, I'll dive more into sharing the ins and outs of creating different types of lettering art. To start, I'm sharing some of my current favorite lettering supplies--a list that is subject to change because it's always fun to try new things!
1. Nibs: I'm currently using these Speedball Hunt Bowl Pointed Pen No. 512 Nibs. I like the fine tip for making delicate lines and the bowl shape to hold more ink. These nibs work well in my next favorite supply...
2. Oblique Nib Holder: After I got this Speedball Oblique Pen Point Holder, I never went back to my standard nib holder. The oblique holder puts the point of the nib at a better angle for writing delicate calligraphy at a slant.
3. Inexpensive "Practice" Gouache: I love using gouache for calligraphy and painted lettering. Gouache is a form of opaque watercolor. When you're learning and practicing, you may go through a decent amount of gouache, so I recommend snagging some less expensive tubes, like this set of 12 paints Artist's Loft.
4. Designer Gouache: For special projects and fancy occasions, you may want to invest in a high quality gouache like Winsor and Newton Designers Gouache. A great color is Jet Black, though they have lots of options.
5. Paint Cups: Gouache does take some prep work to make it the proper consistency for use in a calligraphy pen. These Artist Loft Plastic Paint Cups work great for prepping, using, and storing gouache. [In a future post I'll go over the steps for prepping gouache.]
6. Slim Round Paint Brush: I've been doing more brush lettering and my favorite bush to use is a size 1 round, like this one from Michael's. The slim, long bristles are good for creating thin and thick lines, depending on the angle and pressure you put on them.
7. Watercolor Markers: I started learning how to do modern calligraphy styles with duel tip watercolor markers. They can help you learn about how to apply pressure to create the shapes and lines you want for your lettering. My favorite ones to use are Tombow Duel Brush Pens which come in a wide variety of colors and sets.
8. Pad of Paper: I like mix media paper for everyday use with gouache and markers, two non-dry art mediums. I like this pad by Canson because it's a great size--not too small, not too big to take on-the-go--plus the pages are perforated for easy removal. If you're looking for a higher quality paper for special projects, I recommend an archival quality Bristol paper, like the Strathmore 500 series.
Other tools I use frequently include a ruler, ball bearing compass, scrap paper, cup of water, paper towels, pencil, and large eraser.
I'll be sharing more posts on lettering soon! If you have questions or certain things you want me to cover, please let me know. I firmly believe anyone can learn how to do different lettering techniques with patience and practice, so if you want to learn, now is the time!
Labels:
art,
calligraphy,
currently,
designs,
DIY,
ELM Creative,
essentials,
lettering,
new,
supplies,
tips,
tools,
typography
Thursday, December 24, 2015
Merry Christmas + Free Art Download
Merry Christmas!! I love this time of year--the Christmas music, festive decorations, parties, holiday movies, and all the memories of Christmas past. Plus, let's be honest, exchanging gifts is really fun! I love seeing the look on people's faces when they open a gift they really like and weren't expecting.
I've also been having fun creating new art pieces this season, both for myself and in connection with Dressember. I love recreating the feelings, quotes, and lyrics of the season in handmade artwork. I'm also looking forward to bringing some new styles and designs to my Etsy shop next year!
Until then, I'm sharing a little piece of Christmas art with all of you as a gift and way to wish you a merry Christmas! Thank you for being one of my readers this year! This free downloadable PDF was hand-lettered by me in black gouache (I have a thing for black and white). It prints out nicely on an 8.5 x 11" piece of paper, white or colored, perfect for making your space festive or sharing with friends! Enjoy!
I've also been having fun creating new art pieces this season, both for myself and in connection with Dressember. I love recreating the feelings, quotes, and lyrics of the season in handmade artwork. I'm also looking forward to bringing some new styles and designs to my Etsy shop next year!
Until then, I'm sharing a little piece of Christmas art with all of you as a gift and way to wish you a merry Christmas! Thank you for being one of my readers this year! This free downloadable PDF was hand-lettered by me in black gouache (I have a thing for black and white). It prints out nicely on an 8.5 x 11" piece of paper, white or colored, perfect for making your space festive or sharing with friends! Enjoy!
Thursday, October 15, 2015
My 2015 Etsy Holiday Gift Guide
Christmas is coming and now is a perfect time to start planning for thoughtful, hand-picked gifts. Let my gift guide help you with some one-of-a-kind ideas from my Etsy shop!
In my shop, I specialize in custom creations. My listings feature examples of product designs as well as some pre-made items. With this gift guide, I hope to show you some things that are ready to buy, or give you ideas for something totally new that I could make for you.
When I talk to friends about what they want for Christmas, most say they want something thoughtful. What better way to give a thought-filled gift than a completely custom creation from my shop? I will work with you to design something that reflects the style and personality of whomever you are shopping for.
When you shop through my Etsy store, you are not shopping alone! Consider me your personal shopping assistant, who will also make the items you're buying! Together we can create personal gifts that will be treasured for years to come. Plus, they'll be delivered right to your door!
These journals are perfect for the writer, note taker, or artist in your life. They're also great for anyone who wants to begin keeping a journal but may need help getting started. These notebooks are perfect for women or men of any age. Plus, they can be gift wrapped so they'll arrive ready for gift-giving!
My art options are perfect for home decor and make a great, personal Christmas gift. Plus, if you order a custom piece, I will work with you to create a design that fits the style of whomever you are shopping for. Once you've settled on a size and design, why not purchase a coordinating frame from another Etsy vendor or local store to make your gift complete?
If you don't see exactly what you're looking for here or in my shop, please send me a message or custom order request. I've done paintings, signs, and made various other products for my shoppers. Just because it's not listed doesn't mean I can't do it.
Finally, top off your gift order with a few finishing touches like a card, gift wrap, or a bag tag. When you purchase something through my shop, you will be able to designate if your item is a gift or not. If it is a gift, you will receive a free, hand-lettered tag. On select items, you will be able to add gift wrapping for only $2. Your item will arrived wrapped and ready to go!
If you want more than a swing tag, order a custom card or my pre-made Christmas card set (one set is available, it comes with 3 cards). These cards ship free when you add them onto an order with another item.
As a thank you for checking out my gift guide, use the code "BLOG10" at checkout to receive 10% off your order! Come over to Elm Creative Designs and let's make this holiday season one to remember!
In my shop, I specialize in custom creations. My listings feature examples of product designs as well as some pre-made items. With this gift guide, I hope to show you some things that are ready to buy, or give you ideas for something totally new that I could make for you.
When I talk to friends about what they want for Christmas, most say they want something thoughtful. What better way to give a thought-filled gift than a completely custom creation from my shop? I will work with you to design something that reflects the style and personality of whomever you are shopping for.
When you shop through my Etsy store, you are not shopping alone! Consider me your personal shopping assistant, who will also make the items you're buying! Together we can create personal gifts that will be treasured for years to come. Plus, they'll be delivered right to your door!
These journals are perfect for the writer, note taker, or artist in your life. They're also great for anyone who wants to begin keeping a journal but may need help getting started. These notebooks are perfect for women or men of any age. Plus, they can be gift wrapped so they'll arrive ready for gift-giving!
My art options are perfect for home decor and make a great, personal Christmas gift. Plus, if you order a custom piece, I will work with you to create a design that fits the style of whomever you are shopping for. Once you've settled on a size and design, why not purchase a coordinating frame from another Etsy vendor or local store to make your gift complete?
If you don't see exactly what you're looking for here or in my shop, please send me a message or custom order request. I've done paintings, signs, and made various other products for my shoppers. Just because it's not listed doesn't mean I can't do it.
Finally, top off your gift order with a few finishing touches like a card, gift wrap, or a bag tag. When you purchase something through my shop, you will be able to designate if your item is a gift or not. If it is a gift, you will receive a free, hand-lettered tag. On select items, you will be able to add gift wrapping for only $2. Your item will arrived wrapped and ready to go!
If you want more than a swing tag, order a custom card or my pre-made Christmas card set (one set is available, it comes with 3 cards). These cards ship free when you add them onto an order with another item.
As a thank you for checking out my gift guide, use the code "BLOG10" at checkout to receive 10% off your order! Come over to Elm Creative Designs and let's make this holiday season one to remember!
Thursday, August 6, 2015
Etsy Shop Grand Opening Party + Giveaway!
I am so excited to throw a virtual party to celebrate the grand opening of my Etsy shop, ELM Creative Designs! Everything starts bright and early August 7!
Product Giveaway
Friday at 12 a.m. the giveaway is open! Enter to win this product bundle valued at over $35 by completing the tasks at the end of this blog post. The giveaway will be open through Sunday.
The product bundle includes (clockwise from top): Two nautical-themed mini (3.5 x 5.5") hand-stamped Moleskine notebooks in brown and navy, filled with blank paper; hand-lettered 5 x 7" quote card on archival quality bristol paper, lettered in mint watercolor ink; hand-lettered minimalist hello greeting card in mint; gold color block hand-painted canvas wristlet clutch (approx. 7 x 4"), features detachable wrist strap and zippered opening; hand-lettered happy birthday greeting card in mint; bonus roll of metallic gold triangle print decorative masking tape!
Promo Code
Start shopping tomorrow morning and use code GOPARTY to get $5 off $10 or more through August 14! Plus, for every purchase you make this week, you will receive another coupon code to use on a future purchase through September!
New Shop Products
I'm excited to reveal some new shop products in connection with the grand opening party! These new products are one-of-a-kind and available now!
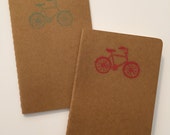
Hand-Stamped Gold Arrows Canvas Clutch // Hand-Stamped Bicycle Blank Mini Moleskine Journal Set
Hand-Drawn Minimalist Hello Greeting Cards // Hand-Stamped Nautical Blank Mini Moleskine Journal Set
Hand-Painted Explore Canvas Panel // Hand-Stamped Turquoise Anchor Canvas Clutch
Hand-Drawn Minimalist Hello Greeting Cards // Hand-Stamped Nautical Blank Mini Moleskine Journal Set
Hand-Painted Explore Canvas Panel // Hand-Stamped Turquoise Anchor Canvas Clutch
Wednesday, June 3, 2015
Art: It's the Best Thing
So by now most of you have seen the shop that I opened on Society6, and if you follow me on Instagram, you've seen the daily drawing challenges I'm participating in. Pushing myself to get back into regularly creating art is one of the best things I've done lately.
Art has been a big part of my life since I can remember. I grew up drawing, painting, sculpting, taking pictures, and writing. I had a legacy of artists who went before me, including my grandfathers and my parents. I was surrounded by inspiration, and encouraged to pursue different artistic projects.
In high school I took pottery classes, art, textiles, and different writing classes that further fueled my love for creativity. I never thought of myself as a great artist, just a kid living life through a creative lens.
Sometime after college I slowly stopped doing a lot of the art that I loved. I began to forget what it felt like to make something, to enjoy the process of creating, to share my work with my family and friends. I think I lost the ability to appreciate the little things, to see the details and capture them.
Then last month I heard about this thing called #DoodleADayMay and thought it sounded like a fun project. Each day there was a different one-word prompt, what you did with it was entirely up to you. Forcing myself to make a new art piece each day quickly reminded me of why I used to love art so much.
It sounds strange to say, but I feel more like myself now. The little girl who loved to draw ponies and rainbows and live life in stories is back. I'm excited for each day, excited for the prospect of making something, of challenging myself, of imagining. When I'm not creating, I'm thinking of new ideas, wondering what I will draw next. And my art supplies are never very far away.
I'm thankful that God gives us things, shards of who He is, to use in this life. I know God is a master artist, a creative Being. His designs are before us every day; the veins in a leaf, the colors in a galaxy, the beauty of the human body. He took joy in everything He created, calling it good, and we, human beings, were the best. We are small representations of His image, and we get to share in aspects of who He is. I'm thankful that I get to make small shadows of the things He has created.
I'm also so thankful for the support I've received from all of you! I've already sold some items from my shop, and I've been getting such kind feedback on my artwork. It means a lot to have your support and encouragement!
You can always find my latest creations on Instagram and Tumblr, and find my shop designs organized newest to oldest here. If you like what you see, please share my shop with anyone else who may be interested! Also, there is FREE worldwide shipping going on through June 7!
Art has been a big part of my life since I can remember. I grew up drawing, painting, sculpting, taking pictures, and writing. I had a legacy of artists who went before me, including my grandfathers and my parents. I was surrounded by inspiration, and encouraged to pursue different artistic projects.
In high school I took pottery classes, art, textiles, and different writing classes that further fueled my love for creativity. I never thought of myself as a great artist, just a kid living life through a creative lens.
Sometime after college I slowly stopped doing a lot of the art that I loved. I began to forget what it felt like to make something, to enjoy the process of creating, to share my work with my family and friends. I think I lost the ability to appreciate the little things, to see the details and capture them.
Then last month I heard about this thing called #DoodleADayMay and thought it sounded like a fun project. Each day there was a different one-word prompt, what you did with it was entirely up to you. Forcing myself to make a new art piece each day quickly reminded me of why I used to love art so much.
It sounds strange to say, but I feel more like myself now. The little girl who loved to draw ponies and rainbows and live life in stories is back. I'm excited for each day, excited for the prospect of making something, of challenging myself, of imagining. When I'm not creating, I'm thinking of new ideas, wondering what I will draw next. And my art supplies are never very far away.
I'm thankful that God gives us things, shards of who He is, to use in this life. I know God is a master artist, a creative Being. His designs are before us every day; the veins in a leaf, the colors in a galaxy, the beauty of the human body. He took joy in everything He created, calling it good, and we, human beings, were the best. We are small representations of His image, and we get to share in aspects of who He is. I'm thankful that I get to make small shadows of the things He has created.
I'm also so thankful for the support I've received from all of you! I've already sold some items from my shop, and I've been getting such kind feedback on my artwork. It means a lot to have your support and encouragement!
You can always find my latest creations on Instagram and Tumblr, and find my shop designs organized newest to oldest here. If you like what you see, please share my shop with anyone else who may be interested! Also, there is FREE worldwide shipping going on through June 7!
Friday, May 22, 2015
Grand Opening: ELM Creative Shop + Sale
I am so excited to announce the GRAND OPENING of my shop on art-hosting site Society6! And what better way to celebrate than with a sale?! Get free shipping + 20% off all apparel, tote bags, phone cases, and mugs!
This shop has helped to fuel my creativity as I have been working hard to fill it with new designs and art pieces. I launched it with a soft opening several months ago, but wanted to add more of my original work before the grand opening. Now I have not only my photography for sale, but also some of my painting and lettering designs!
Please come check out what I currently have to offer! Also, if you sign up for my ELM Creative email updates, you will be the first to know about new designs and sales! (Updates are only periodic and definitely NOT spammy, I promise!)
I'm so thankful for the support and encouragement I have already received. I've always wanted to have a shop of my own and now I get to! My goal is to create unique designs and also meet the requests of my shoppers. So, if you have a particular design you would like to see, let me know! The sky's the limit!
Labels:
apparel,
clothes,
currently,
designs,
ELM Creative,
ELM Creative Shop,
gifts,
grand opening,
mugs,
new,
phone cases,
products,
sale,
shop,
Society6,
style,
Things I Love,
totes,
work
Subscribe to:
Posts (Atom)